Quick Start Guide
Welcome to Gloss Vault - your comprehensive and private store for your personal finances.
We want to get you up and running with the basics as quickly as possible so you can start seeing what you have.
Below are 3 steps to get you started.
If you have questions regarding a topic that is not covered here or if you need further assistance, feel free to reach out to us at support@gloss-vault.com and our team will answer your questions.
Step 1: Register for Gloss
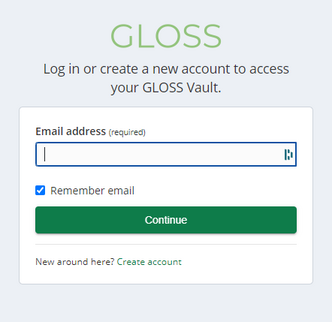
- To register for Gloss, go to Gloss Vault
- Select the “Create Account” link on the Login Page or go directly to Sign Up for Gloss Vault
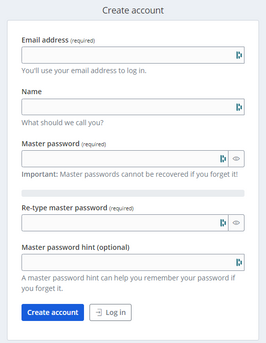
- This will redirect to the ‘Create account’ form
- Complete the required fields
(You are required to provide your email address and set up a master password. These details will be used to log into Gloss. Optionally, you can provide your name and a hint for your password.) - Click the ‘Create Account’ or ‘Log In’ button and you will be redirected to the Login Page
Once the account is created, you will be navigated back to the login page where you can log in using your newly registered credentials.
Step 2: Import your data
Whether it’s cash withdrawals, credit card purchases, transfers, or conversions, your financial transactions provide valuable insights.
Cash transactions involve physical cash movements, while credit transactions cover credit card expenses.
Why import transactions? It’s all about gaining a comprehensive overview of your financial landscape.
By aggregating data from various accounts, you can create budgets, track spending, and analyse trends efficiently.
Let’s dive in and organise your financial records!
The most reliable way to edit your CSV file to the required format is to open it in a spreadsheet editor like Excel or Google Sheets. Once you've opened your CSV you can edit the file so it matches the format below:
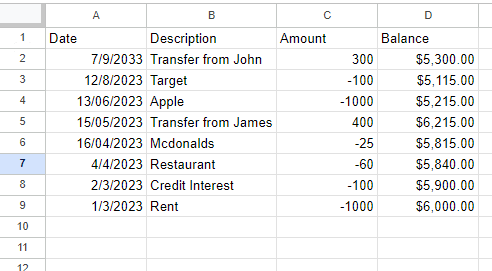
Your spreadsheet editor may differ from the screenshots above, so you can download and open this sample CSV file to review exactly how a properly formatted file appears in your editor.
CSV FileOnce you have your file in the required format, save it in a CSV format. This option is usually available in the File menu, under Save As or Export.
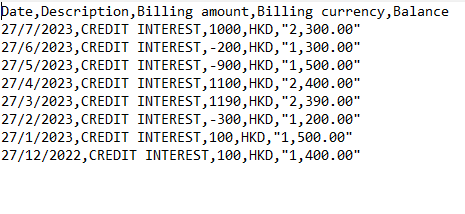
If you don't have access to a spreadsheet editor, you can open your CSV file in a text editor to make the necessary changes.
In the example below, the first line is the header, the second line is an example inflow and the third line is an example outflow
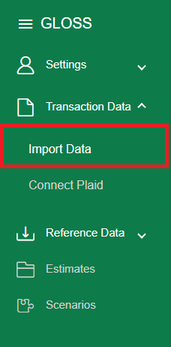
- In the left menu, navigate to Transaction Data → Import Data
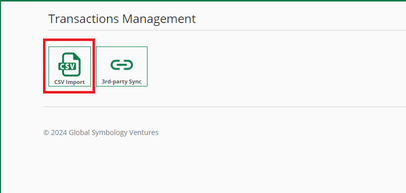
- Select ‘CSV Import’
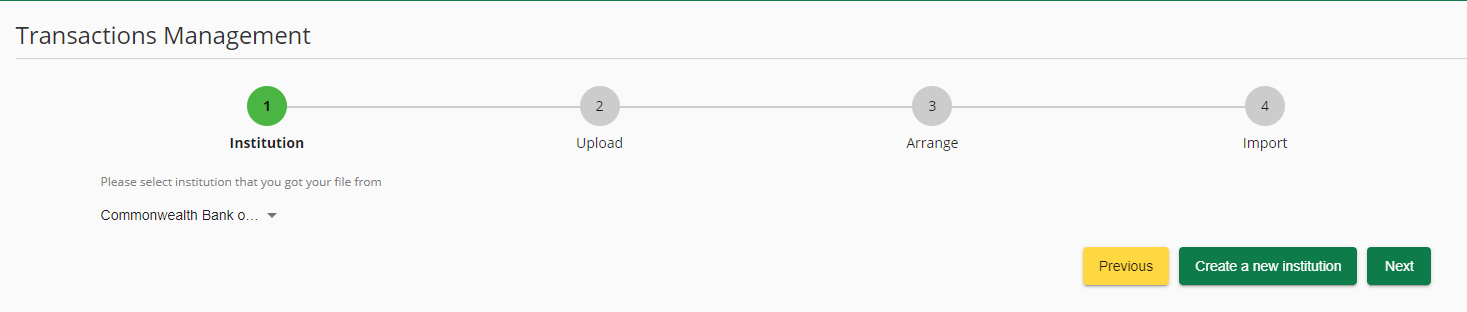
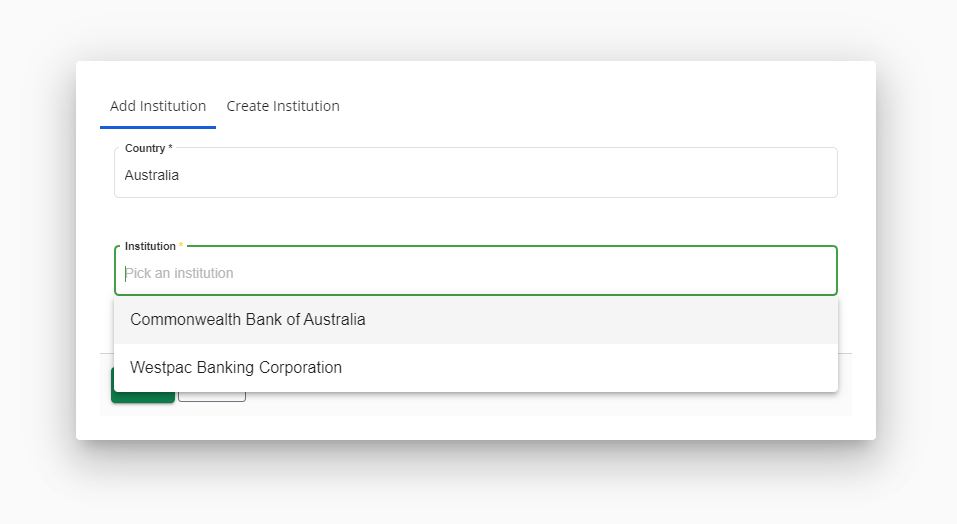
- Select the institution you downloaded the file from
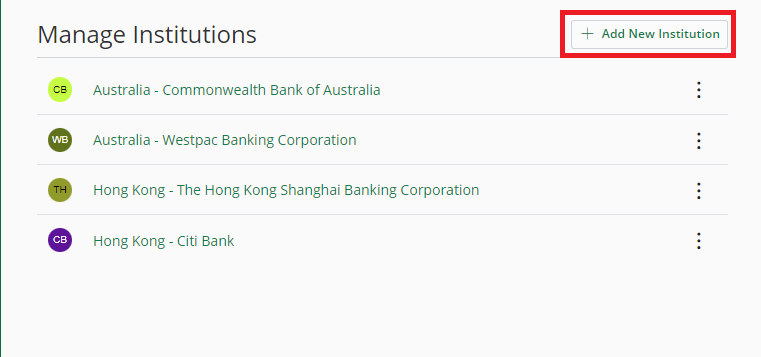
- Click the 'Add New Institution' Button
- You can start by selecting the country your institution is based in and selecting your institution.
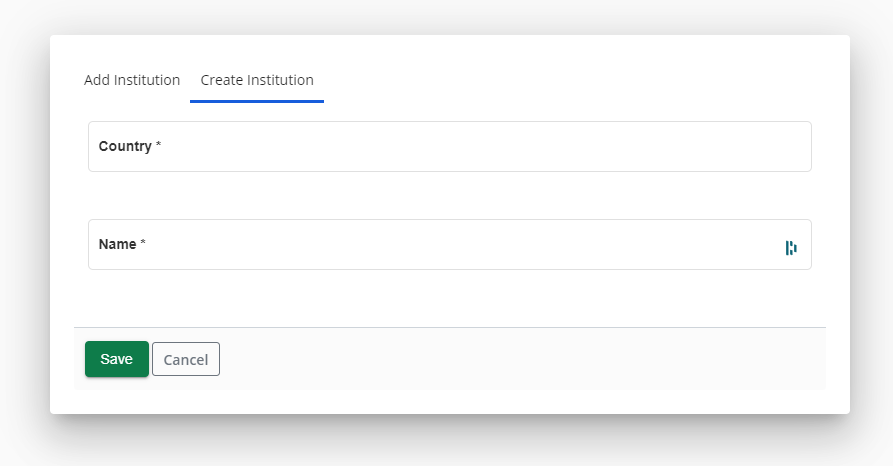
- If you can't find your institution, you can head over to the 'Create Institution' tab and create one.
- Select ‘Choose File’. This will navigate to your computer documents
- Once the file name is displayed in Gloss, select ‘Next’
- Gloss will automatically detect and match the columns in your file but requires a check to ensure that this mapping is correct. Update the column mapping if needed.
- If the ‘Next’ button is available, proceed to the following step. If not, select the green arrow:
- Select your preferred date format
- Click on the 'Import with selected format' button
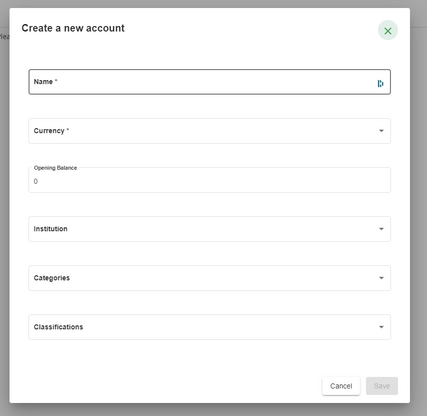
- Click on the 'Create a new account' button
- To create an account fill in the Account Name and Currency fields and optionally the Opening Balance, Institution, Category and Classification.
- We can now move to the last step of the process. Here you have the option to define your data and remove any invalid transactions.
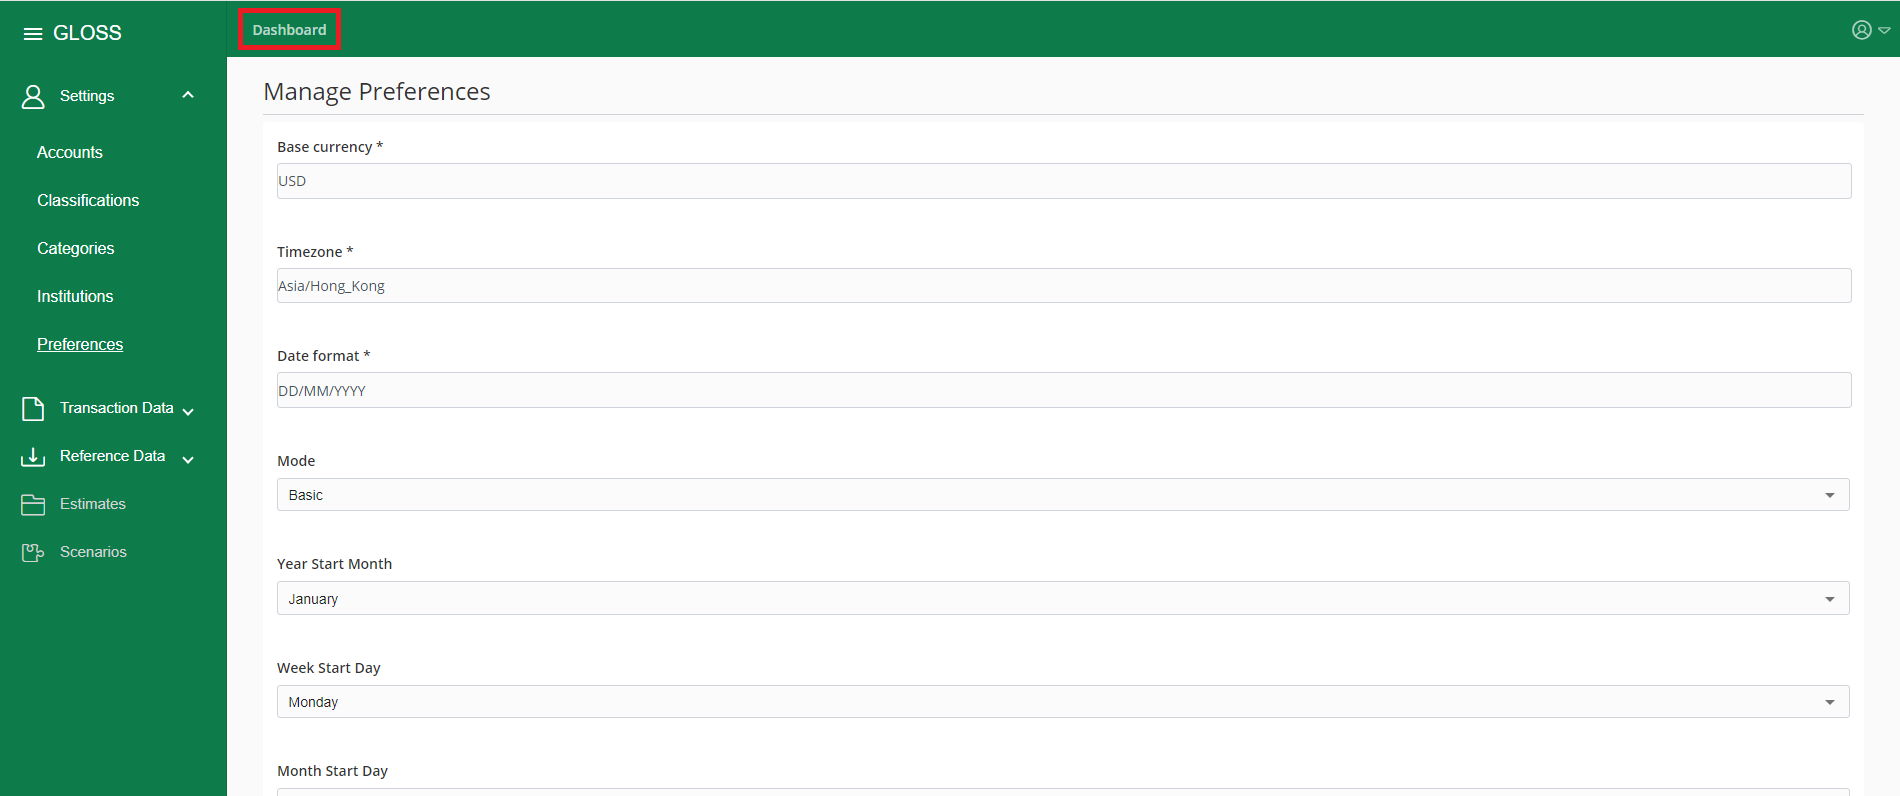
- Navigate to the Dashboard by clicking the 'Dashboard' button in the top header
- The Dashboard should be visible at the center of the screen
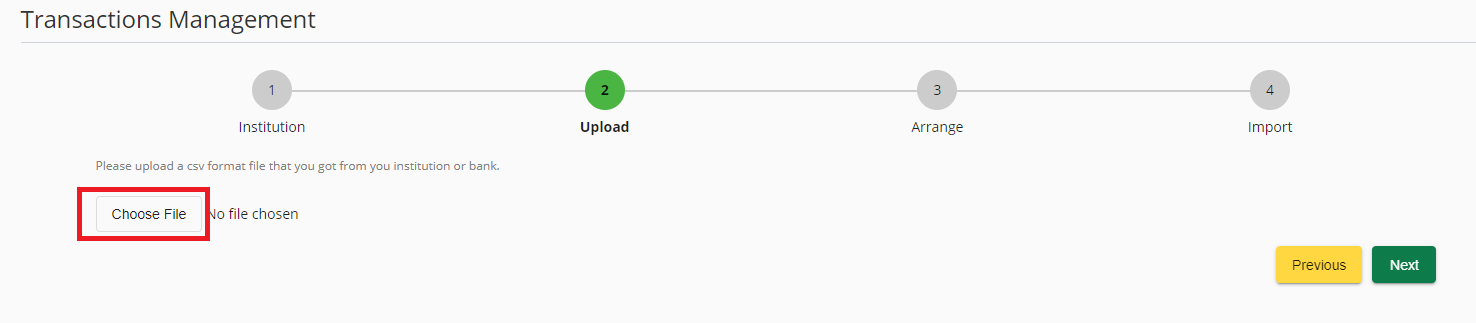
Select the file to upload


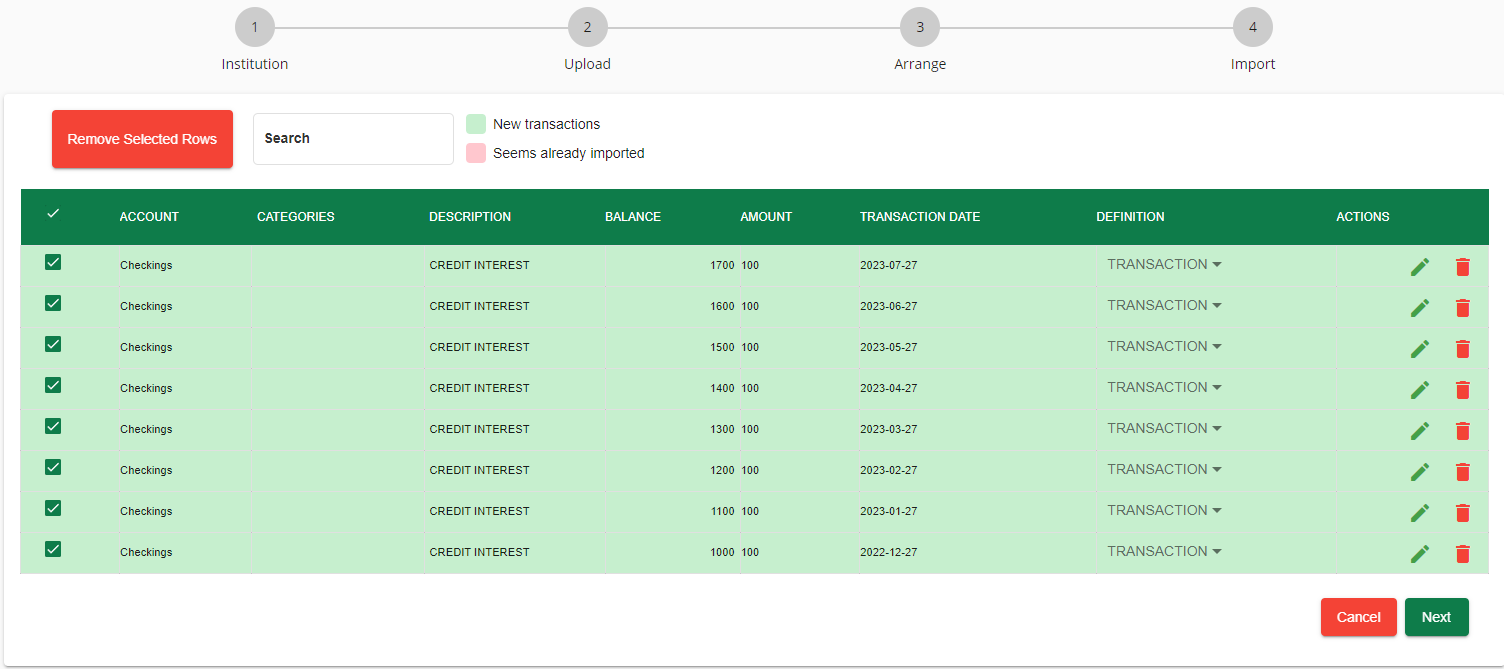
Gloss is able to detect if you've imported a Transaction, Opening Balance or Closing Balance but may occasionally be incorrect. If that's the case, you can define your data using the column headings. The Glossary can give you decriptions of every heading available
You also have the option to add a category to each of your transactions by selecting the pencil icon.
After doing so you will be able to edit the category of your transaction
If you want to delete a transaction, you can select the delete icon
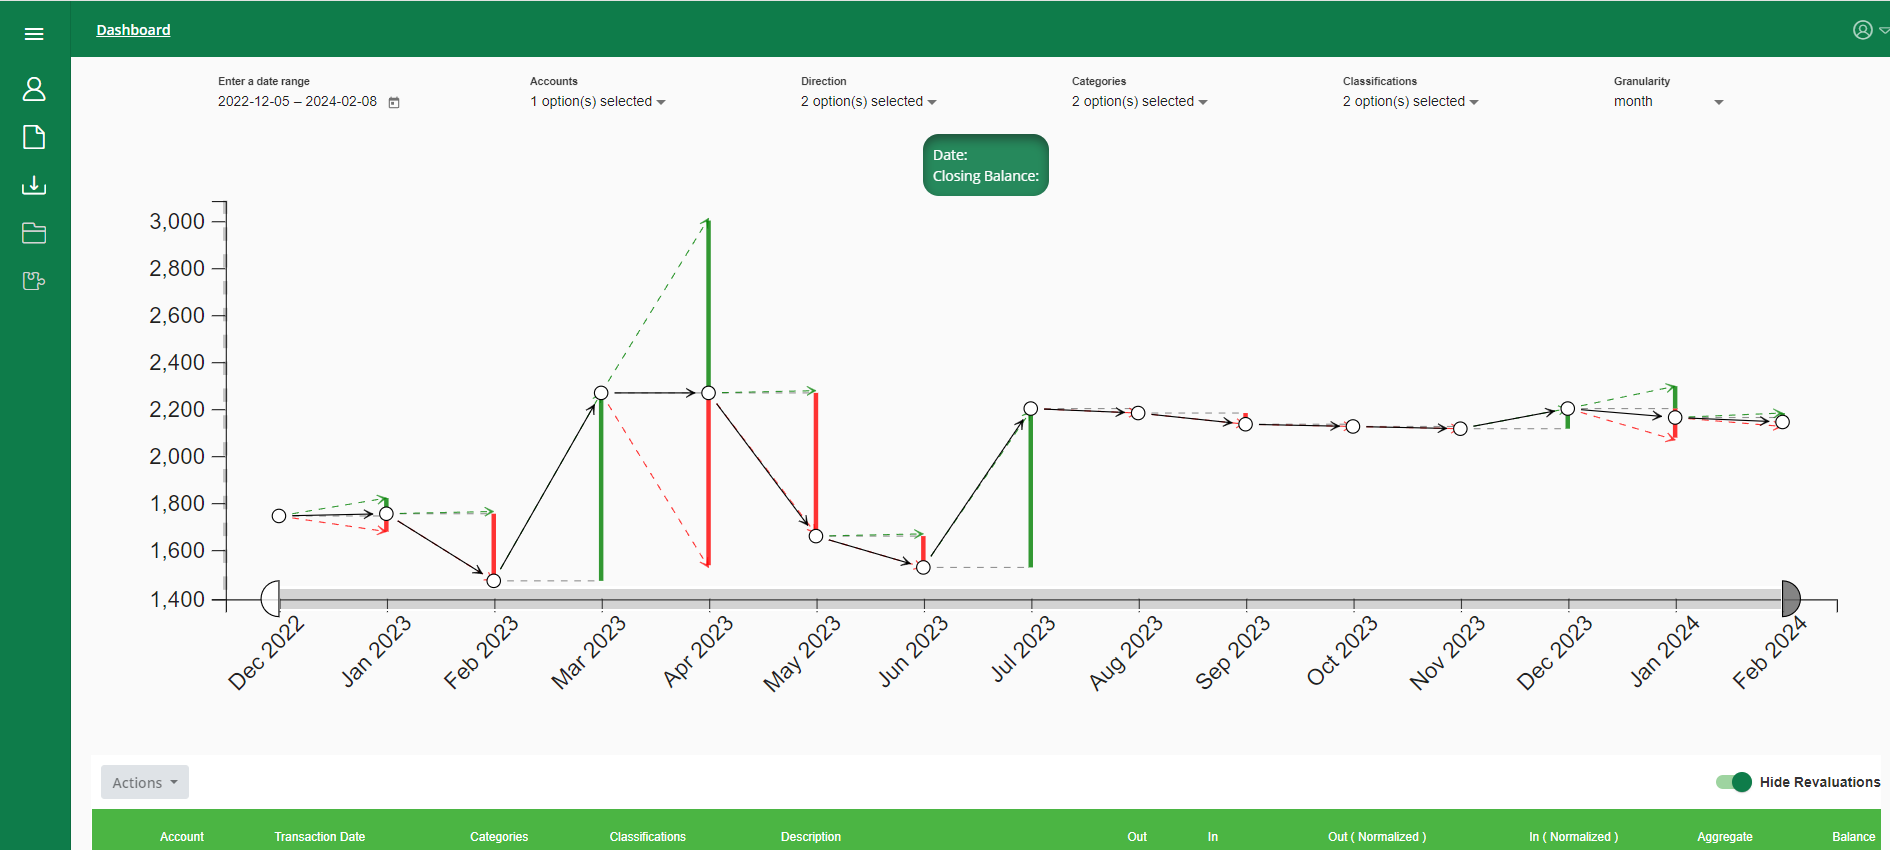
Step 3: View Dashboard
The Dashboard provides a snapshot of your financial world.
Here, you’ll find an overview of your transactions—whether it’s cash flowing in or credit flowing out. Keep an eye on your balance movements, track trends, and stay in control.
Let’s dive into the numbers and make informed decisions!
Glossary:
| Field | Description |
| In | A positive IN is considered as money deposited into the account. A negative IN is considered a credit |
| Out | A positive OUT is considered as money credited to your account. A negative OUT is considered as a deposit into your account |
| Amount | Money debited and/or credited to your account. Money flowing in is indicated as a positive and money flowing out is indicated as a negative |
| Transaction Date | The date at which a transaction occurred |
| Description | The description of the transaction that occurred |
| Balance | The total amount of money available in an account, at a given time |
| Transfer | A set amount of a single symbol moved from one account to another |
| Currency | The currency at which the transaction originated |
| Conversion | Changing the symbol (eg. currency) of a transaction or balance based on the conversion symbol and rate |
| Conversion Rate | The ratio between the transaction currency and the base currency of your account |
| Symbol/Conversion Symbol | The standard ISO Currency code of the transaction currency |
| Account | The account associated with the transaction e.g. checking, saving, credit card |
| Classification | Tags for transactions that allow users to create sub-accounts or grouped accounts |
| Category | Tags for transactions that allow similar transactions to be grouped together |
| Revaluations | Balance adjustments to reflect fluctuations in the exchange rates between the transaction and base currencies |
| Balance Alignment Transaction | Placeholder transactions created by Gloss to reconcile any missing or invalid transacations which result in a misalignment beween the balance and transactions |